Once an assignment is created, a column is automatically created for the assignment in the Gradebook. There is no need to create an item in the Gradebook for the assignments.
Assignments
Assignments allow faculty members to create coursework and manage the grades and feedback for each student separately. Assignments may be created inside any folder or learning module, but we recommend creating a folder or module for each week that includes all of the content, tasks, and assessments students will complete during that time frame.
When an Assignment has been created, students may complete the assignment by submitting a file, typing their response, or embedding media from sites such as Kaltura. The faculty member may respond to each student separately, supplying feedback about their individual assignment with inline annotation, attaching files, recording audio/video feedback, or completing a rubric.
Assignments that are created within Blackboard will automatically generate an item in the Gradebook.
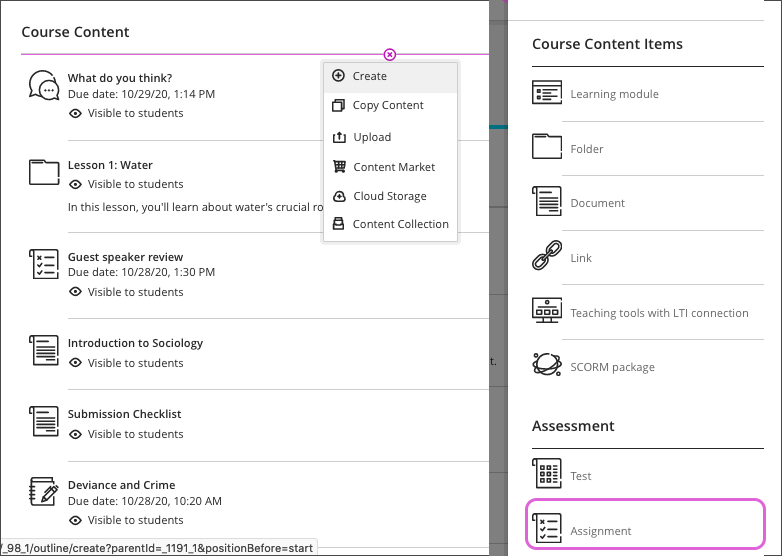
Assignments are added by clicking the plus icon inside the course and selecting Create. Learn more about adding Assignments in Ultra Course View »
Assignments in Ultra Course View can include:
- An interactive rubric
- Course conversations to facilitate discussion or Q&A about the assessment
- Group collaboration and submission
- Peer review
- A timer that restricts the time students have to complete the assignment once they have viewed the instructions
- Embedded media from integrated tools, like Kaltura
AI Design Assistant and Assignments
You can use the AI Design Assistant to generate an assignment prompt that encourages students to:
- engage in higher-order thinking
- apply knowledge gained from your class
- produce authentic submissions that are evidenced
- emulate real-world situations
By default, the AI Design Assistant will use the course title to generate the prompt, but you can use the settings to provide additional context, like a written description or by pointing to other content in your course. You can also specify the level of Bloom's Taxonomy that you would like to use for the assignment.
You can also use the AI Design Assistant to generate a rubric that you can use to assess student submissions.
Frequently Asked Questions
Use the paperclip icon in the Instructions text editor to attach a file. Based on how students will use the file, you can choose whether they can view it in the browser, download the file, or both.
If you have already created the assignment and need to edit the instructions to add a file, click the pencil icon below the Instructions heading to open the text editor again.
There are two ways that you can create an assignment for students to submit in-class without submitting anything through Blackboard.
Offline Assignment
Within the Assignment, click the gear icon to access the Assignment settings and enable the Collect submissions offline checkbox. You can use the assignment to provide instructions for students and communicate the due date. This will create a column in the Gradebook where you can enter grades and feedback for students.
Manual Grade Item
Instead of creating an Assignment, you can create a manual entry in the Gradebook. To create a manual item:
- Open the Gradebook in either the Grades or Gradable Items tab
- Move your mouse between two existing gradable items (between the column headers on the Grades tab), or to the beginning or end of the list of items
- Click the plus icon that appears and choose Add item from the menu
If the assignment visibility is set to Hidden from students, then students will not be able to view the assignment in the course content or in the Gradebook. This means students will not be able to access their feedback or grades for the assignment.
If you use Release Conditions to set a start and end date for the assignment, then students will only be able to view and access the assignment from the course content between those dates. They will be able to view their feedback and grades from the Gradebook, but they will not be able to submit the assignment.
To be certain that students cannot submit the assignment after the due date, you can also use the settings to prevent new attempts or submissions after the due date (click the gear icon to access the assignment settings).
To download student submissions in bulk:
- Go to the Gradebook on the Grades tab
- Click the column header for the assignment you wish to download
- Click Download Submissions in the menu
- Select the student submissions you wish to download using the checkboxes (click the checkbox at the top to select all students)
- Click the Create ZIP File button
- Click the Send button in the pop-up
You can also download them from the Submissions page for the assignment, which you can access from the Gradable Items view in the Gradebook or by clicking the Submissions tab if you opened the assignment from the course content page.
Blackboard will create a ZIP package with all of the assignment submissions. You will receive an email when the file is ready to be downloaded; the email will contain a link to download the ZIP package.
No, you can specify that certain assignments are not used in Gradebook calculations. In the calculation configuration, open the category that contains the assignment and click the Exclude symbol (a circle with a slash through it) for the individual assignment.
Assigning Grades and Providing Feedback
Assignments are created with 100 points possible as a default. You can edit it while you are creating the assignment or return to update it later. To edit the points possible for an assignment:
- Open the Assignment from the content list (you can also edit an Assignment from the Gradebook on the Gradable Items tab by clicking the ellipsis and choosing Edit, or on the Grades tab by clicking the column header)
- Click the gear icon in the Assignment Settings to the right
- Scroll down to the Grading & Submissions section
- Update the Maximum points
- Click the Save button
Note that if you change the maximum points for an Assignment that uses a Points or Points Range rubric, students' scores will be automatically adjusted from the rubric values to scale to the maximum points specified. For example, if the rubric is worth 25 points but the Assignment is worth 100 points, students' scores will all be adjusted by multiplying them by 4.
- Open a student submission to grade from the Overview tab (click the Grade Now button), from an assignment submission list (click a student's name), or from the Grades view (click a cell and then View from the menu)
- In the flexible grading view, the rubric should be visible in the panel to the right. If it isn't, click the grid in the grade pill to the upper right
- Click the criteria names to open and view and select performance levels. Above the rubric you can toggle descriptions on or off. Next to the Grading Rubric heading, you can click to open the rubric in a separate panel
If you use the rubric in the side panel, it will save as you enter results. If you open it in a new window, you will need to click the Save button before closing the rubric.
Yes, you can set up different grading scales using Grade Schemas. To access the schemas in your course, go to the Gradebook and click the Gear icon in the upper right. Click the Manage Grade Schemas link at the top of the side panel.
Every course has a default Letter grade schema that matches the recommended Graduate schema, meaning that it includes a C-. You can remove that level for Undergraduate courses, or modify it entirely if you use a different grading scale. You can also add additional schemas, if needed.
If you want to record a value without having students submit something through Blackboard, you can create a manual item with a Text display to avoid point values entirely.
To create a manual item:
- Open the Gradebook in either the Grades or Gradable Items tab
- Move your mouse between two existing gradable items (between the column headers on the Grades tab), or to the beginning or end of the list of items
- Click the plus icon that appears and choose Add item from the menu
Unfortunately, if you want students to submit something through an Assignment, there has to be a point-value associated with it, but you can use either the default Complete/Incomplete grade display or set up a custom Grade Schema so that the grade displays as text instead of a numerical value. You can also exclude the item from Gradebook calculations by clicking the circle/slash icon within the calculation configuration.
Blackboard doesn't have a built-in check, check plus, or check minus feature. However, by adding a manual item in the Gradebook with Text as the display, you can enter a square root sign √ in place of a check mark, it is possible to get close to these values. You could also create a column that is worth points and use a custom Grade Schema to set up the ranges for each value.
To enter a √ on a Windows PC, ensure that Num Lock is ON and then hold down the Alt key and type 251 using the number pad and then let off the Alt key. Then, a - or + can easily be entered after the √.
Blackboard does not allow you to enter an Overall Grade if you have not already set up a calculation. Once you have set up a calculation for the Overall Grade column, you can enter grades as overrides by entering a value out of 100 (essentially, the percent the student earned, or the percent that corresponds to the letter the student earned).
The easiest way to enter an override for the Overall Grade is to view the Gradable Items tab of the Gradebook and click the Overall Grade link. You can enter override grades on the list of student grades.
Assignment Statistics
For an assignment, you can view overall student activity from the course content page, which includes data on whether students have opened the assessment, the average time between opening and submitting the assignment, and (after grading) a grade distribution chart. You can also view the activity timeline and grade for each student. To access student activity, find the assignment in the content list, click the ellipsis (...) to the right, and then click Student Activity.
You can also view summary statistics of the grades for the assignment, such as minimum, maximum, range, average, median, standard deviation, and variance. To view the statistics, go to the Grades or Gradable Items tabs in the Gradebook and open the menu for the assignment by either clicking the column header (Grades) or the ellipsis (...), then click Statistics.
Learn More
Tutorials
- Grading Assignments with Flexible Grading
- Providing Assignment Feedback with Annotate
- How to Use SafeAssign in Assignments
- Create an Assignment
- Create a Group Assignment
- Associate a Rubric
Quick Guides
- Creating and Editing Assignments
- Create Group Assignments
- Downloading Assignments
- Grading Assignments
- SafeAssign
- Self and Peer Assessment
See Also...
Get Help
Technical Support and Student Help
Division of IT Service Desk815-753-8100
servicedesk@niu.edu