The best way to try it out is to experiment with a Shell. To try building a new course, request a Shell, then convert it to the Ultra Course View. To see what an existing course looks like in the Ultra Course View, request a Shell, use Course Copy to copy an existing course into the Shell, and then convert it to the Ultra Course View.

Blackboard Ultra Course View
Timeline for Transition to Blackboard Ultra Course View
The Blackboard Ultra Course View has been available as an option for anyone teaching at NIU since Summer 2019. During that time, Ultra Course View adoption has grown, over 50 additional features have been released, and some of the most requested features anticipated for release in summer and fall 2022. Blackboard has only guaranteed that the Original Course View will remain available through the end of 2023, and we want to provide sufficient time for faculty to make the transition to the Ultra Course View.
NIU will plan for full migration to Ultra Course View no later than December 31, 2023. It is recommended that faculty plan to teach their Fall 2023 courses in Ultra Course View. All Spring 2024 courses will use the Ultra Course View. Learn more »
Highlights of the Ultra Course View
The Ultra Course View is cleaner and more modern than the Original Course View. It is simpler to use and more intuitive, as well. Tools are contextual to reduce clicks and content appears in the course using peek layers that slide from the right.

Content is displayed on a single page within learning modules and folders that expand and collapse, so it is easier for students to find the content and assessments they need.

Quickly add files, links, assignments, and other content and assessments wherever you want! In addition to uploading files from your computer, you can also add content from cloud storage systems like OneDrive For Business, Dropbox, or Google Drive. Learn more about creating content in Blackboard Ultra.
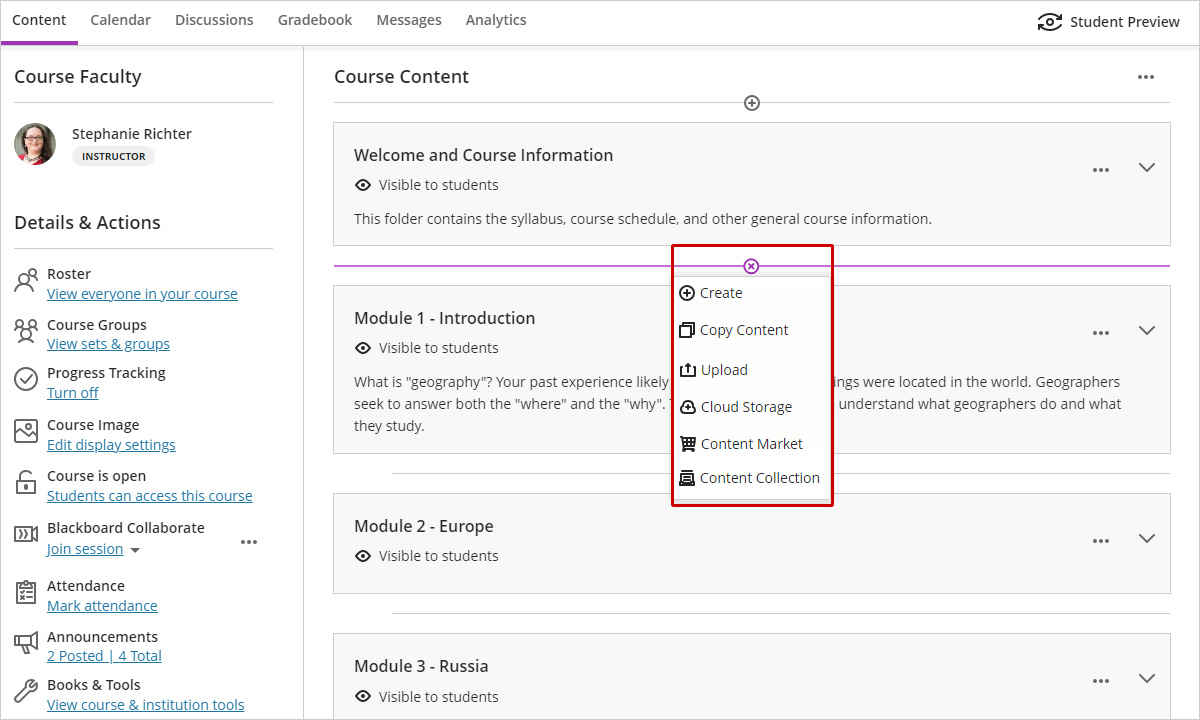
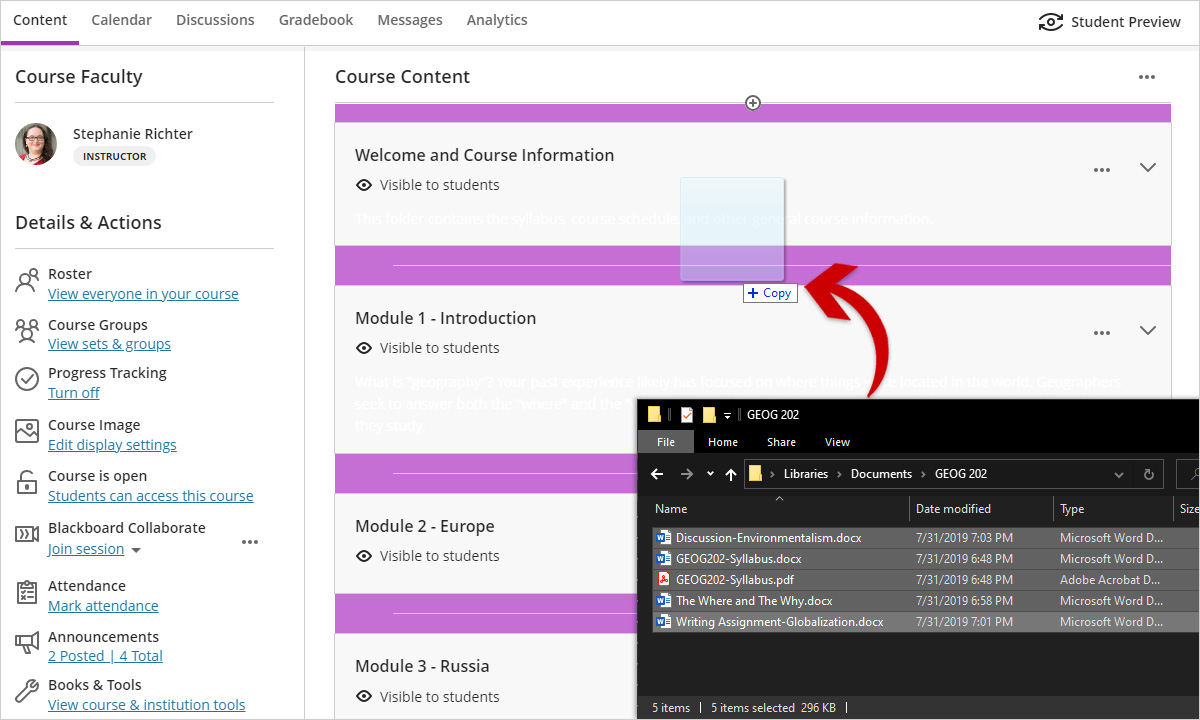
Quickly add files to your course by dragging them to the content panel of your course. You can drag one or multiple files, or even a folder (in some browsers). Learn more about creating content in Blackboard Ultra.
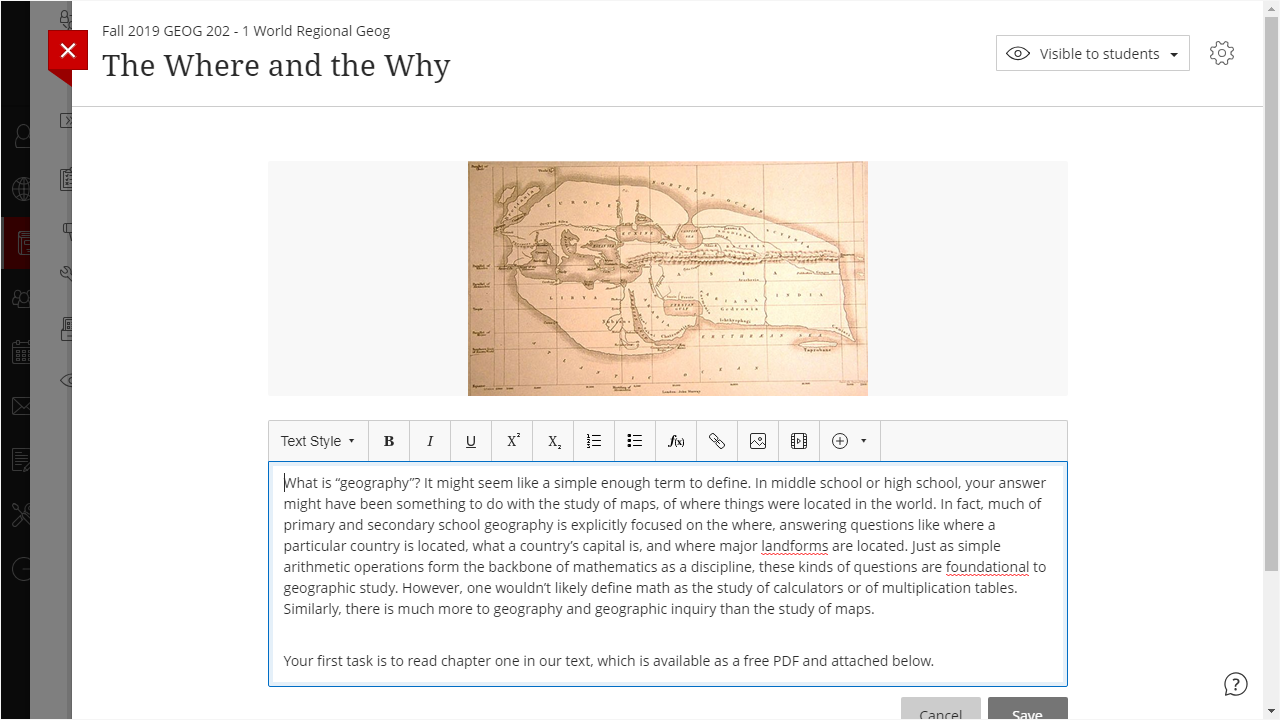
While you can build your content primarily using uploaded files, the Ultra Course View includes a new content type, Document, that allows you to build complex pages with a mix of text, images, videos, and files. Documents are optimized for mobile devices, so you and your students can access them directly from a smartphone browser. Learn more about the Document content type.

The brand-new text editor in the Ultra Course View is optimized to create content that is mobile-compatible, so that you and your students can access it directly from a smartphone browser. The text editor is simplified, but includes tools for formatting text, adding links and media, and embedding mathematical and scientific formulas in your text. Learn more about the new text editor.
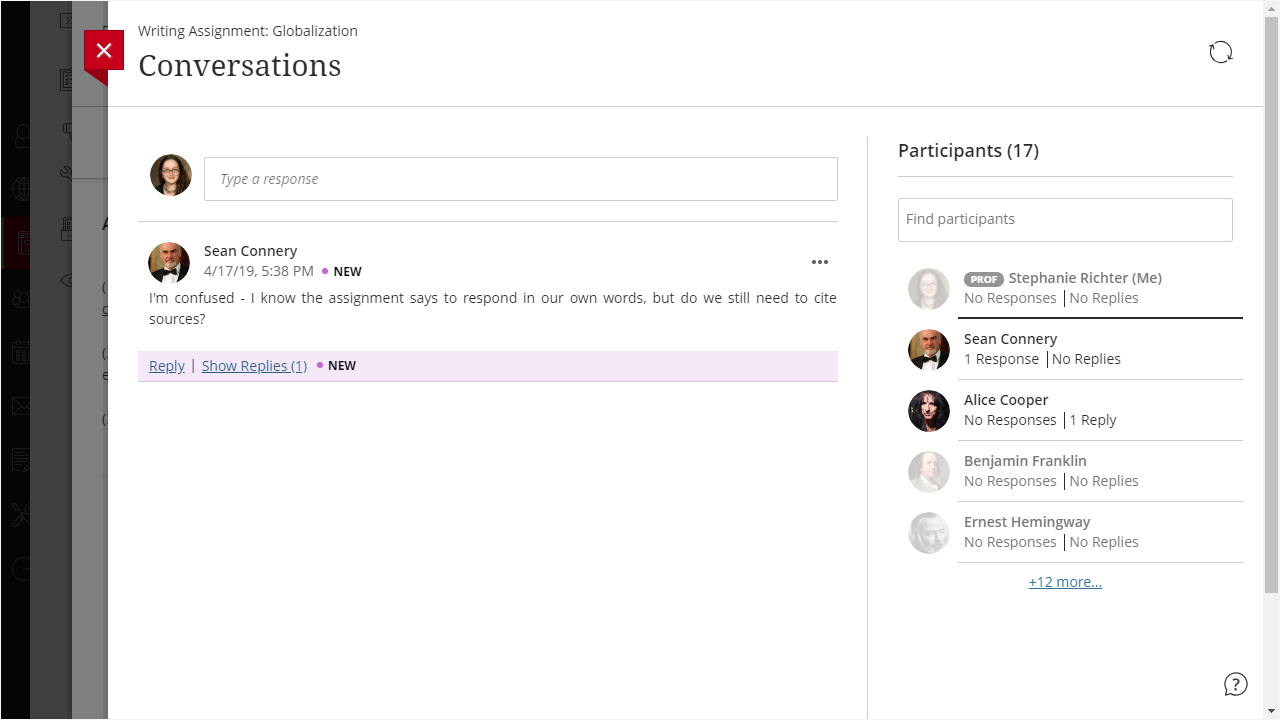
If you enable Conversations for individual content items, students can discuss the content with you and their classmates. They can ask for help, share sources, or answer questions others have. As the conversation develops, it appears only with the relevant content. You can enable conversations for Documents, Assignments, and Tests. Learn more about Class Conversations.
The Item List is your new default view of the course gradebook. You can view all the coursework you have assigned and your grading progress. Quickly see how many students have submitted an assessment, how many you need to grade, and how many grades need to be posted. You also can see when you have completed grading an item.
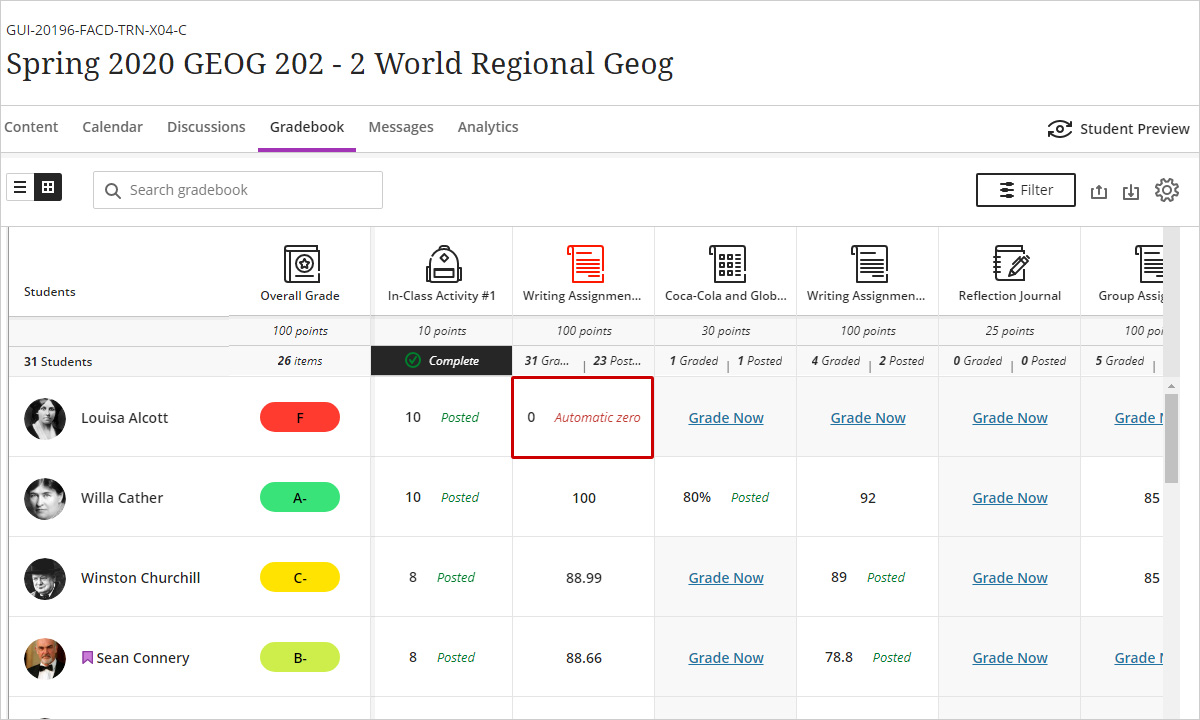
Use the toggle in the upper left to switch from Item to Grid view. The Grid view is a traditional spreadsheet-like view of the Gradebook. Learn more about grading in the Ultra Course View.
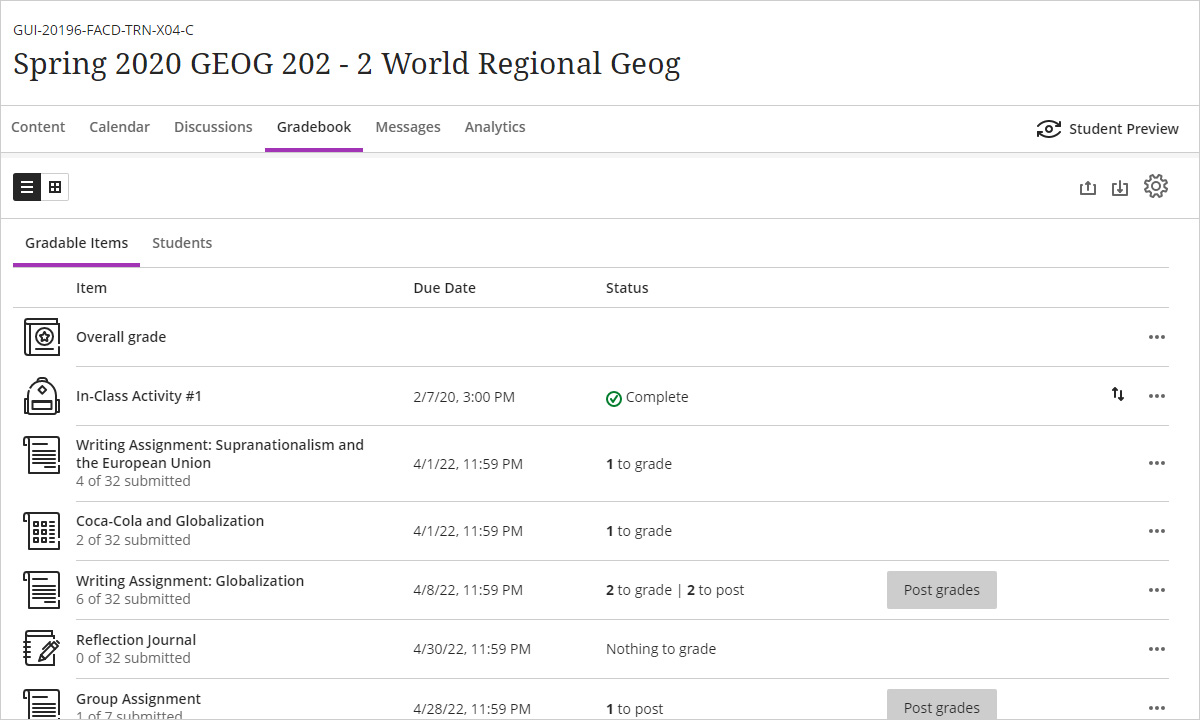
In the Ultra Course View, you can control exactly when students are able to see the grades you have entered. Once you enter a grade, it is private until you Post it. You can post individual grades, or wait and post all of the grades for a particular assessment at once. Learn more about entering and posting grades.

If your assessment has a due date enabled, Blackboard can automatically assign a zero to any student who does not submit the assessment by the due date. You can override the zero with a grade, of course, but the automatic zero can help students realize that they have missed a due date.
While automatic zeros is enabled by default, you can disable it in the Gradebook settings. Learn more about Automatic Zeros.
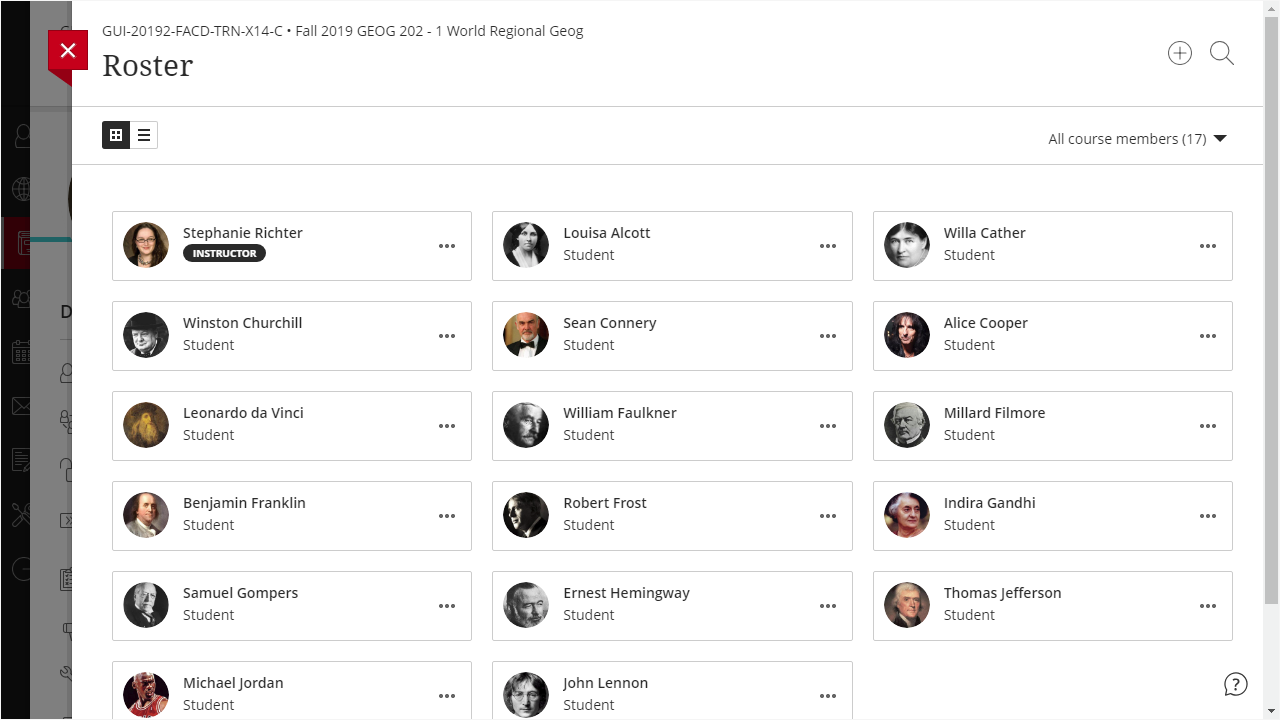
Get to know your students with the new profile photos, which they can edit from their Profile in the global navigation menu. These photos appear in the Roster, Gradebook, Discussions, Conversations, Messages, and more. Learn more about Profiles.
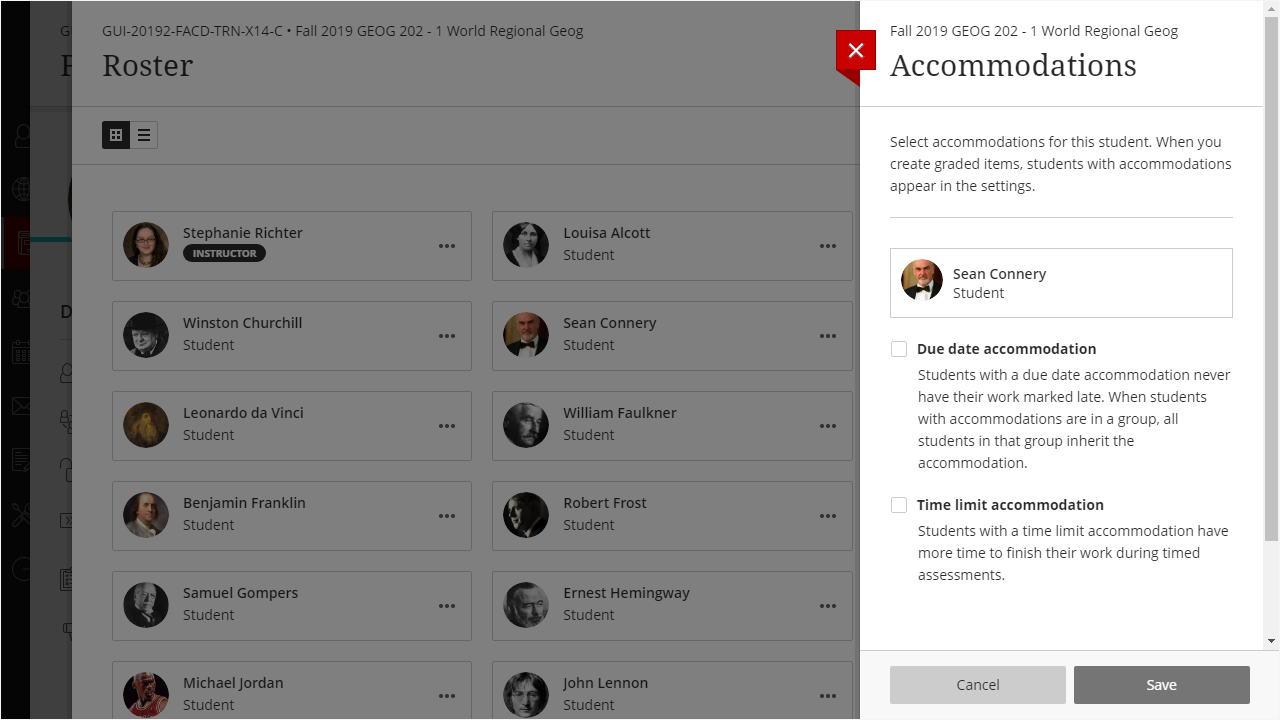
In the Ultra Course View, you can set accommodations for a student once via the Roster, and then they will apply to all assessments in your course. Accommodations can affect due dates, by never marking a student's submission as late, or the time limit, by providing extra or unlimited time for assessments with a timer. Learn more about Accommodations.
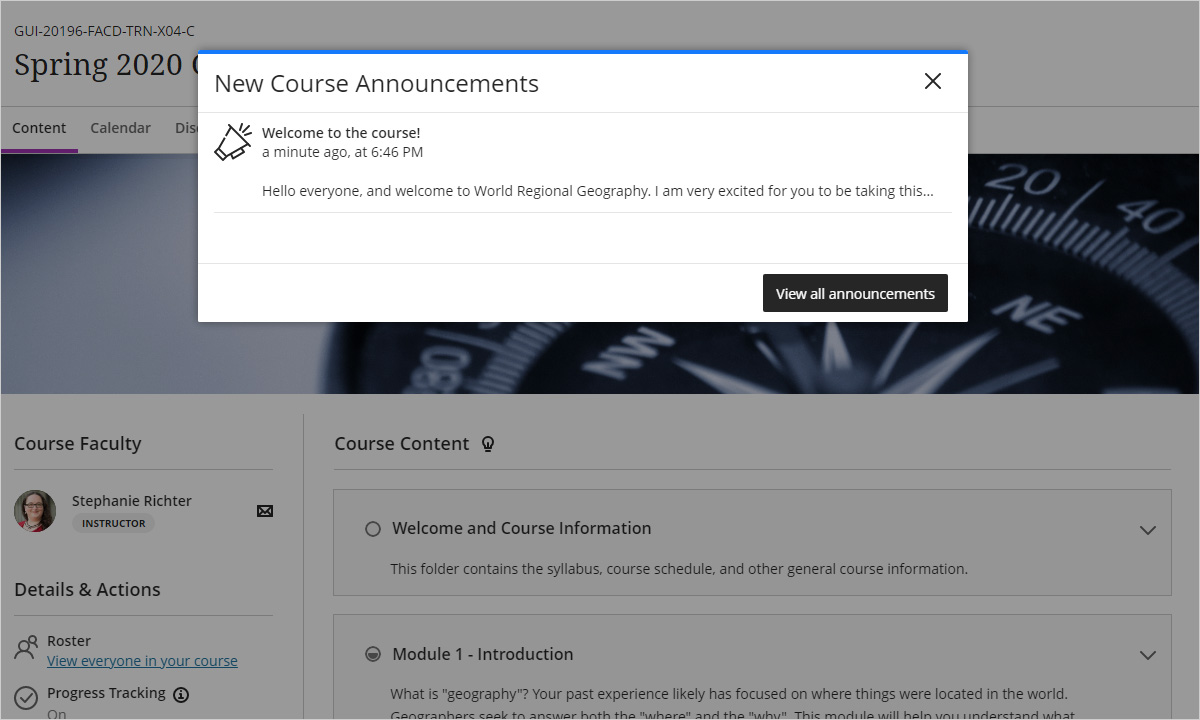
In the Ultra Course View, in addition to having announcements sent to students via email, they also appear in the Activity Stream along with other course updates. Additionally, they now in Ultra Course View also appear as pop-ups for each student the next time they enter the course. Learn more about Announcements.
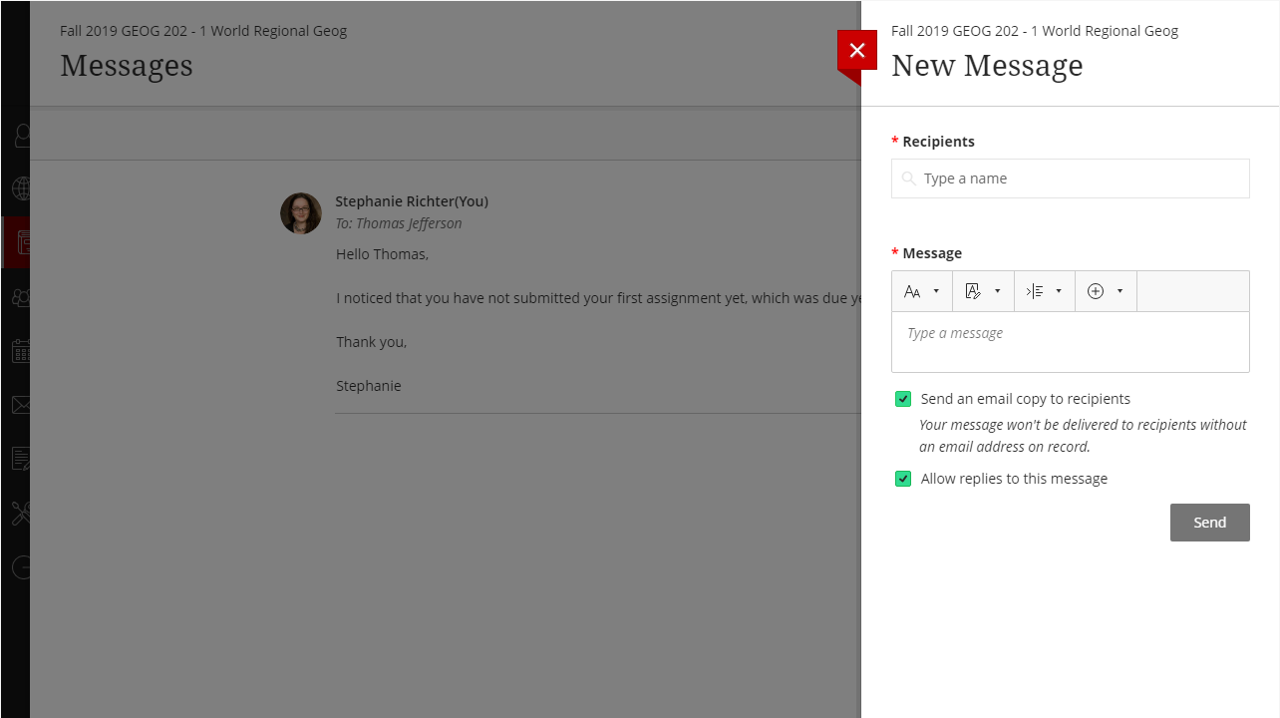
The Ultra Course View does not include the Send Email function that you may be used to in the Original Course View. Instead, send Messages. You and your students can send messages to each other, multiple people, or the entire class. Unlike sending an email in Original Course View, the Messages are kept in the system and can also be sent via email. Learn more about Messages.
Frequently Asked Questions
Building Your Course
Folders and Learning Modules are both great ways to organize your course materials so that it is easier for students to find what they are looking for. Learning Modules offer additional benefits over folders, however.
Benefits of Folders and Learning Modules
- Both present content in an organized manner for easy navigation
- Both collapse for a streamlined view of materials
- Both include a sub-folder (i.e., a folder inside of a folder or a folder inside of a learning module; you can not nest a learning module inside a learning module, nest a learning module inside of a folder, or nest beyond 2 levels)
- Both can be used to set overall release conditions to control access to content, such as releasing content on a specific date or to a specific group of students
- Both can be copied from past courses as a block of materials with all of the contents inside
Benefits of Learning Modules
- Students can navigate from one item to the next via forward and back arrows
- You can enable sequential viewing to require that students view content or complete an assessment before moving to the next item
- With sequential viewing enabled, the learning module displays checkmarks to show students what they have completed
Limitations of Learning Modules
- Contents of folders can be copied granularly from one course to another (e.g., you can copy a single file from within a folder)
- Learning Modules must be copied in their entirety from one course to another (e.g., you must copy the entire learning module and its contents, as opposed to a single item inside of the learning module)
You can drop one or more grades from a category in the Overall Grade calculation. To do so, you must be calculating the overall grade by categories as opposed to individual items.
To drop one or more grades:
- Go to the Gradebook and edit the Overall Grade calculation. If you have not previously set up the Overall Grade, you will find the option to set it up at the bottom of the list view.
- Under Overall Settings to the right, select Grade category weights from the drop down menu.
- Set the appropriate weights for each category.
- Click the Add Rule link for the category from which you wish to drop a grade.
- In the panel on the right, click to Enable the rule, click the radio button to Drop Scores, and enter how many of the highest or lowest scores you wish to drop.
- Click Continue at the bottom of the side panel.
- Click Save at the bottom of the page.
In Ultra Course View, the Overall Grade only offers a weighted calculation at this time. There are 2 potential workarounds that you can use so that your overall grade is calculated based on points.
Convert Points to a Weight and Use the Overall Grade Column
Set up the Overall Grade using individual item weights instead of category weights. For each assessment in your course, divide the points possible for that assessment by the total points possible for the course and multiply by 100 to convert to a percentage. Then, use that for the weight for that assessment. For example, if you have a 50 point assignment and there are 500 total points in the course, 50/500 = .05, or 5%. Repeat this step for each assessment, and make sure the total of all the weights is 100%.
Create a Calculated Total Column and Set the Overall Grade Column to Only Be Based On That Total
In the Gradebook, hover your mouse over the existing items and click the plus (+) sign. From the drop down menu, click Add Calculation. Provide a Name for this calculation (like "Total"). In the Functions and Variables area, click Total. Click Total again on the right side of the screen, and select all of the categories or individual assessments to include in the total. Click the Savebutton.
Then, you can set up your Overall Grade using individual item weights, but with 100% as the weight on the Total you just created. Click the Exempt symbol (circle with a slash) to remove all other items from the calculation and then click the Save button.
Converting Your Course
No, once you have previewed your course in the Ultra Course View and then selected the option to keep the Ultra Course View, the conversion is permanent and cannot be reversed. You will be able to preview the course first in the Ultra Course View to determine whether you want to keep the Ultra Course View or return to the Original Course View. If you select to keep the Ultra Course View and then confirm the decision (this requires 2 clicks), the change will be permanent.
The Ultra Course View only permits 2 levels of course folders. However, when you convert a course from Original to Ultra Course View, the content areas from your course menu become top level folders in the Ultra Course View. If you had more than a single level of folder within a content area, you can end up with three folders nested in the course in the Ultra Course View. This makes it difficult or impossible for you to create new content or move content in the course.
For example, if you had a content area named "Course Modules", with a folder for each module, and a folder for the activities within that module, that is 3 levels of folder: Course Modules > Module 1 > Activities.
To make it easier to move and create content in your Ultra course, we recommend moving the second level (e.g., Module 1) out of the top level (Course Modules) folder. Once you have moved them, everything should work as expected.
If you are still having difficulty moving content with only 2 levels of folders, try moving content with your keyboard instead of drag and drop.
In order to convert your course from the Original Course View to the Ultra Course View, the course has to be completely private/unavailable. If you left the check box selected to automatically open your course to students on a specific date, your course is technically available, even though students won't be able to access it until that date. You will need to first make your course unavailable by clicking the lock icon in the upper right corner of your course.
![]()
Once your course is completely private/unavailable, you will be able to convert your course from Original to Ultra Course View using the pencil icon in the upper right.

Get Help
Technical Support and Student Help
Division of IT Service Desk815-753-8100
servicedesk@niu.edu