Migrating Flash-Based Presentations to Video
This guide will provide three potential solutions for migrating/converting Flash-based presentation content to video hosted in Kaltura. Note that these processes will not recreate interactivity that may have been part of the original Flash-based package, including quizzes, links, menus, or other animations. Some of this interactivity could be approximated after conversion using Kaltura's Quiz and Hotspot features.
During its heyday, Flash was often the format of choice. It scaled well, it was powerful, and enabled interesting interactivity. However, in part because of its architecture and system-level access, it became a target for hackers and other bad guys as a conduit to users' computers. Adobe worked hard to patch and upgrade Flash to protect users but eventually announced that it would phase out its support of Flash. Browsers, in turn, as a security measure have begun to make it more and more difficult to play Flash content, with most planning to eliminate flash support in the next year. Chrome, for example, will not support Flash playback after December 2020.
Flash-based slide presentations are a common application of Flash in higher education courses, in part due to the popularity of a tool called Adobe Presenter as well as recordings of content created in or published to Adobe Connect. Adobe Presenter is a PowerPoint add-in that provides a workflow for creating and publishing narrated slideshows from within PowerPoint. One of the issues with these tools, particularly in presentations created with older versions, is they often published solely or by default to Flash format. These presentations often require browser permission to run (e.g. "Allow Flash") and/or have file extensions including .swf in their packages. More recent versions of Adobe Presenter and Articulate Presenter do publish to HTML5 format, which do not suffer from the same issues as Flash, and continue to be supported in modern browsers.
Therefore, if you are hosting recording presentations published from Adobe Presenter in Flash format, not only have you likely already seen problems with playback, as browsers have begun blocking Flash by default, soon you and your audience will have a difficult time playing the presentations at all, in any browser. Additionally, in some cases, particularly with older presentations, the original source files may not exist, such as the presentation itself or the related audio files.
There are at least three potential options for replacing these types of presentations published in Flash:
- Creating and recording a new presentation
- Reconstructing and republishing the presentation as an MP4
- Capturing a recording of the existing presentation as it plays
Option 1: Create a Presentation with New Slides and Narration
The first option is to simply create a new version of the presentation by creating new slides and then using either Kaltura Capture to capture a PowerPoint presentation and narration or by recording narration in PowerPoint and publishing to MP4, then uploading to Kaltura. This is a great option if your content is older and needs to be updated anyway.
Creating a Narrated Presentation with Kaltura Capture
Creating a Narrated Presentation using PowerPoint and Kaltura
Option 2: Reconstruct and Republish
This option requires access to the original PowerPoint show and the published package folder from the Flash presentation (e.g. Adobe Presenter). These tools generally publish a folder of files that support the presentation. Here are the steps for this option:
- Open the PowerPoint show. Immediately click File, Save As, update the file name and choose PowerPoint Presentation (*.pptx) from the filetype dropdown in the save window.
- Download and extract the published package if necessary.
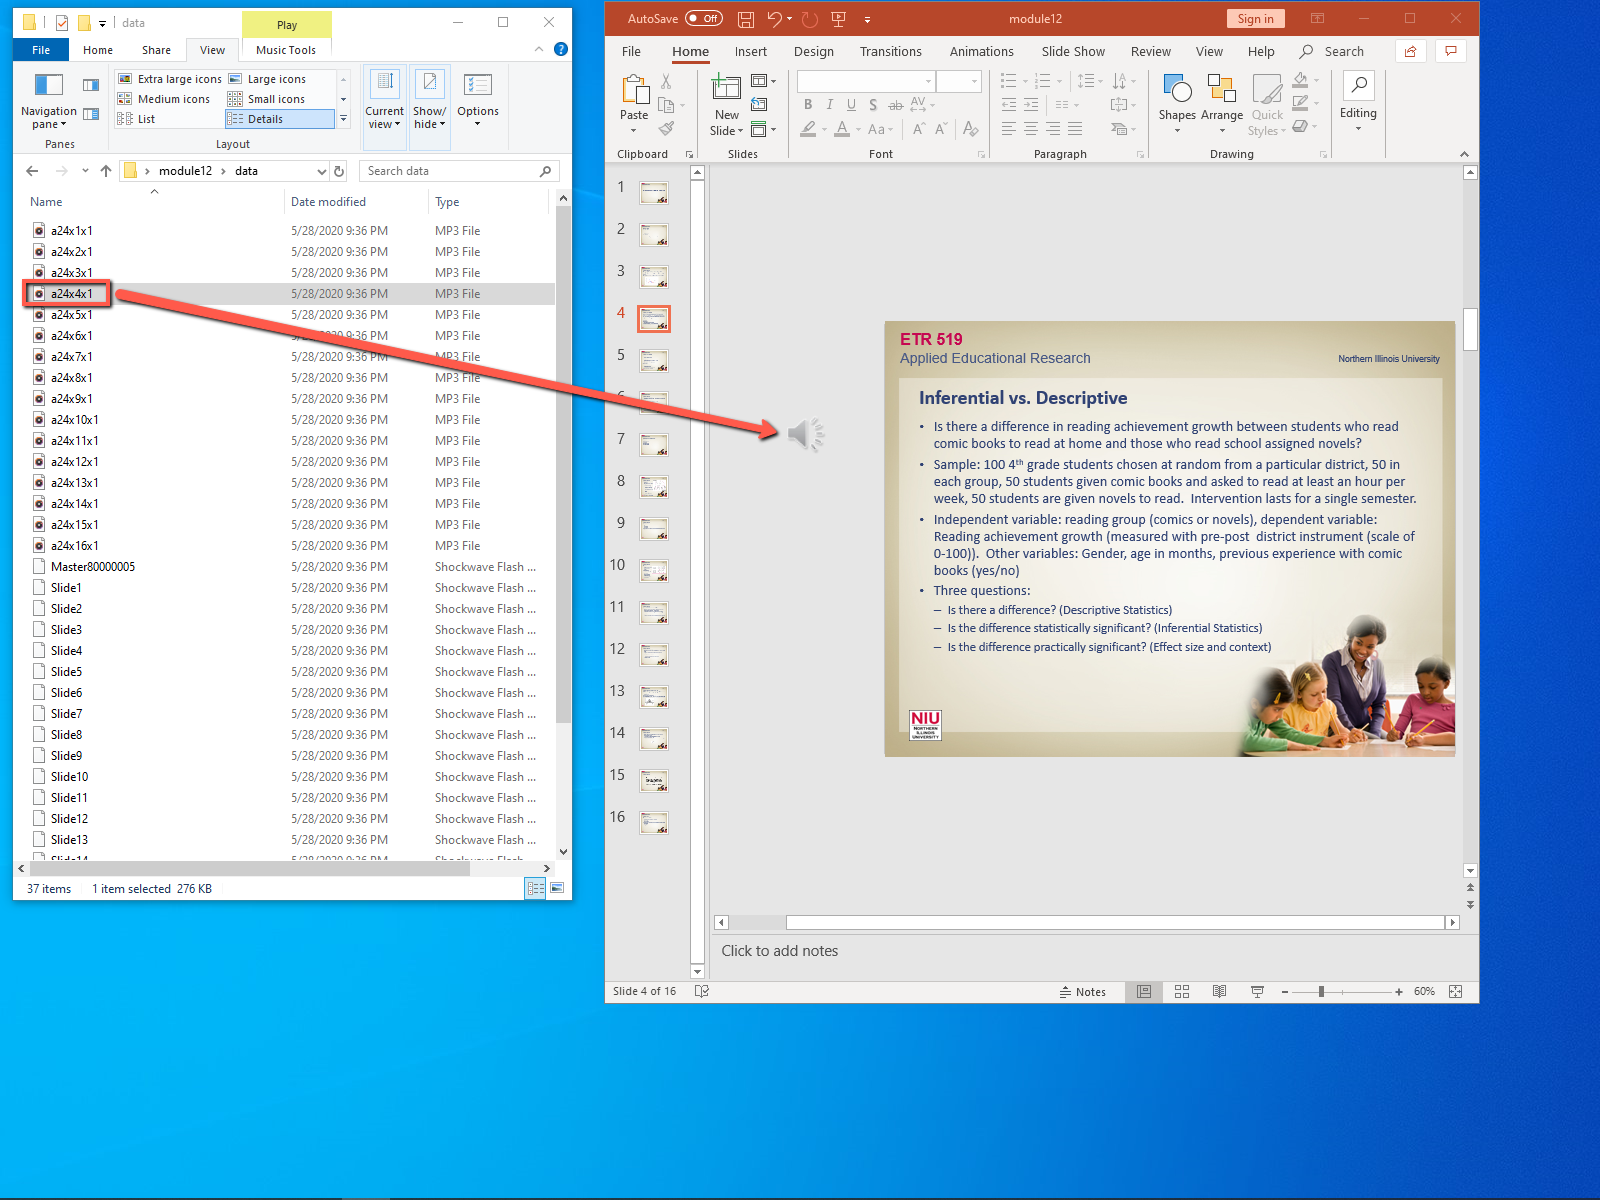
- Locate the audio files in the published package. In Adobe Presenter presentation folders, the audio files are stored in a folder called "data" inside of the main folder. The MP3 files will generally have a slide number somewhere in the file name.
- Click and drag the appropriate MP3 file onto the canvas for each matching slide in the slideshow.
- Save the presentation.
- Click File, Export, Create a Video.
- Leave the default settings and choose Create Video.
- The video will take several minutes to an hour to publish.
- Once the video has published, test playback and upload to Kaltura for hosting and sharing. See the Creating Narrated Presentations using PowerPoint and Kaltura video above for details.
Option 3: Capture a Recording of Existing Presentation (Windows Only)
This option is used when you simply want to record the audio and video of a presentation using Kaltura Capture. Some considerations for using this option:
- You must be able to play the original presentation, so you will need to find a Flash compatible browser and manipulate its settings to allow the Flash presentation to play. For example, Chrome can currently be enabled to play Flash content.
- This option requires capturing the audio from the video as it plays, an option that is only available in the Windows version of Kaltura Capture, as MacOS blocks access to system audio.
- You must have a headset or other microphone with a mute option.
- It is very helpful to have two monitors connected to the computer when using this strategy; the recording controls can be placed on one screen while the presentation to be recorded is played as maximized as possible on the other. If the recording tools are visible on the screen captured, the tool palette will be part of the recording.
- You must play the presentation and record in real time, so this method requires as long as the video is to accomplish.
Here are the steps for this option:
- Launch the presentation using a Flash compatible browser.
- If the presentation begins to play, press pause and rewind to the beginning of the video. Maximize the video's size on screen using the browser controls and player controls.
- Login to Kaltura via Mediaspace or Blackboard/My Kaltura Media.
- Click Add New then Kaltura Capture. If you have never used Kaltura Capture before, download and install the application.
- Once the Kaltura Capture panel has launched, select the Manage link from the right side of the panel, then the settings gear icon on the left, then select Record System Audio.
- Click Create New Recording.
- Position the Kaltura Capture panel where it will not be recorded (e.g. on another screen or to the side of the presentation window). You may also use the Auto minimize when recording option along with the CTRL-SHIFT-R keyboard shortcut to start and pause recordings. This will keep the recording panel out of the recording if using a single screen.
- You must select a microphone, otherwise, the system audio (audio track of the video) will not be recorded. This microphone must have a mute switch or button so that background noise is not recorded.
- Click the Screen button, select the screen with the presentation video, and choose Select area.
- Use the screen selection tools to draw a box precisely around the presentation video slide display. Do not include any other buttons or player interface (including the play button). Click Confirm.
- Press the red record button to begin recording, then quickly press the play button on the presentation player. If your cursor passes inside of the recording box, it will be recorded.
- Press the stop recording button on the Kaltura Capture Panel or CTRL-SHIFT-R to pause or CTRL-SHIFT-S to stop the recording.
- Title your recording, include a description and tags. Preview your video as needed and click Save & Upload to upload to Kaltura.